Quick Start Guide to Building a Contract
Creating a Contract
There are three ways to start creating a contract. You can do so in management, while converting a property reservation into a contract or through Enterprise Sales.
Adding Locations
Click "Add Location" to add a location to the contract.

Once you've added the location successfully, the location will appear on the screen along with new options to edit ownership, custom price, add decedent and remove graves. Continue to add locations to the contract as needed.
Adding Merchandise or Services
Add Merchandise or Services to the contract by clicking "Add Merchandise" The item will be added to the contract right away along with price and tax.

You can also assign merchandise to a grave by clicking the "Location" drop down and selecting the grave you'd like to assign the merchandise to.

Adding Owners/Purchasers/Beneficiaries to a Contract
Simply click "Add Person" or "Add Institution" to start adding the ownership information.

Once the ownership information has been added, you can adjust the stakeholder type from the drop down menu. This will change the stakeholder to list them as "Owner," "Purchaser," or "Beneficiary." See our guide to stakeholder roles.

Adding Decedents
If this property is being purchased on an At-Need basis you are able to add decedent information to the contract. Click "Add Decedent".

Fill in the deceased information and then click "Create and Add." The deceased record will be added into webCemeteries into the identified burial right as soon as the contract status is updated to "Signed."

Add Payment Terms
You can add payment terms at any time to an In Progress contract (you will not be able to update the terms after the contract is in "Signed" status). Click "Add financing" under Payment Terms.
If you need to edit payment terms, click "More..." on the left side menu to expand the list of options.

If the contract is going to be paid as a one time fee you can skip adding payment terms as they typically apply to financing.
Generating a Document
If you have Dynamic Forms setup, click the "More..." button again, but this time select "Generate Documents."
This will Generate and Fill out a document that populates the fields with information from the Contract:

Updating Contract Status
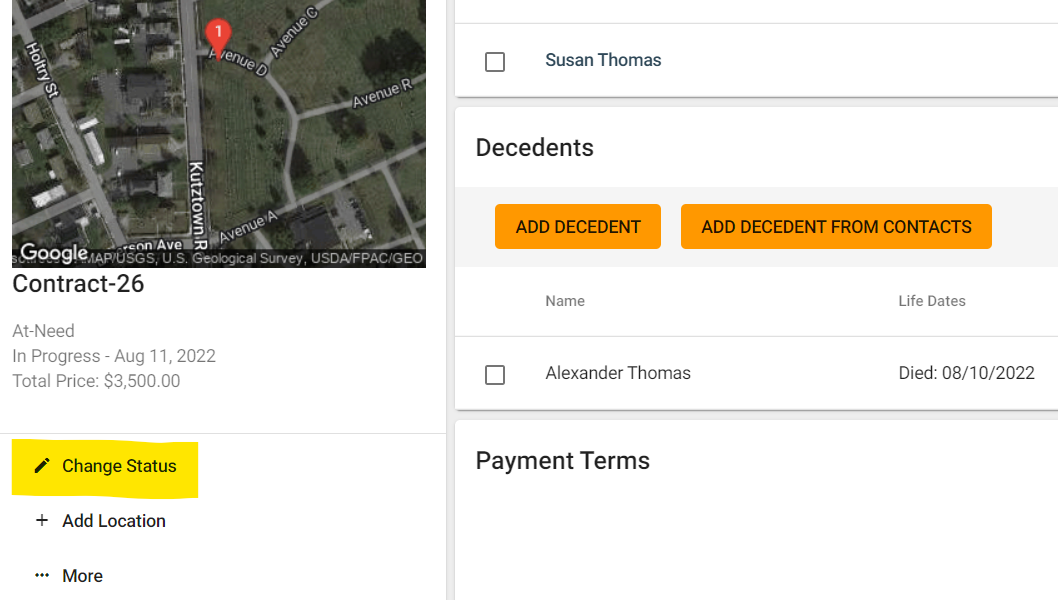
Click "Change Status" on the left side of the page and change the status to one of the four statuses that we offer.
There are four status options available: Signed, Price Lock, In Progress or Cancelled.

Set the status to "Signed" if this contract has been signed and executed. This will make the contract finalized and will not allow you to edit the payment terms or details again.
Paid in Full Status
You can change the status to "Paid In Full" once all payments have been made on the contract.
