How to create a Reservation in Enterprise Sales
The Reservation System is a powerful tool which allows Sales Counselors and Managers to reserve available properties from out in the field while using the Enterprise Sales Application. If you are a Cemetery Administrator and this is your first time using the Reservation System, this guide will walk you through the basics of getting a couple of items set up so that your staff will have the tools needed to start reserving property out in the field. If you are interested in licensing this application, please reach out to webCemeteries at support@webcemeteries.com or 1-800-653-7049.
Step 1
Log in to webCemeteries Management.
Step 2
Creating User Roles
We highly recommend creating user roles for your sales team, grounds crew, office staff and any other roles that are crucial to your cemetery. For example, you may want to give your grounds crew members access to search property and view property in the sales app, but not reserve property. Or you may want to give a sales counselor access to view, search and review property in your cemetery but not have access to enter new deceased records in the management system. Since every cemetery contains different job roles, take the opportunity to create user roles that match these job types.

Step 3
Add/Update Users in your cemetery. Now that you've established a new set of user roles for the cemetery, you'll want to go through your users list and make some updates.

Step 4
Reservation Types have to be created in order to start reserving property in the Reservation System. Reservation types are not actual reservations, but they are the building blocks on which reservations can be successfully created. Reservation Types allow a cemetery to determine what types of properties they will allow to be reserved, for how long and by which user roles. For example, some cemeteries might like to have a pre-need or an at-need Reservation Type. An at-need reservation is different from a pre-need reservation so we let you determine the parameters for how long each reservation will be held and which user roles can make that reservation type. .
Step 5
Start Reserving Property.
Open the app from the home screen of your mobile device or visit Enterprise Sales from your desktop computer. If this is your first time accessing the Enterprise Sales App please review this article to learn how to add the app to your device's home screen. Once you've logged in, you will see a list of the cemeteries you have permission to view, or if you are only accessing one cemetery you will see the app tools which you can start using.


Click "Location and Status" to search by Location or by property status.

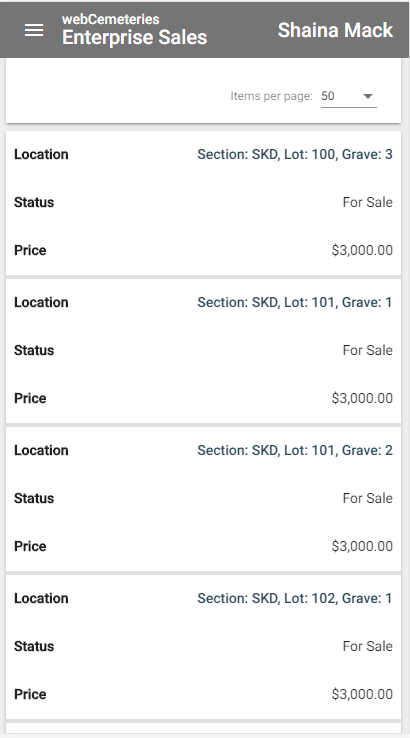
Select a Section from the drop down list if you'd like to see all properties in that section, or filter your results further by entering other location information. You can also search by property status to see all For Sale properties in a section. If pricing information has been added into your database you can also search price ranges. Below is an example of a search you could run.
Search results will appear below and you can scroll to find the location you are looking for. Click the location to view more information.
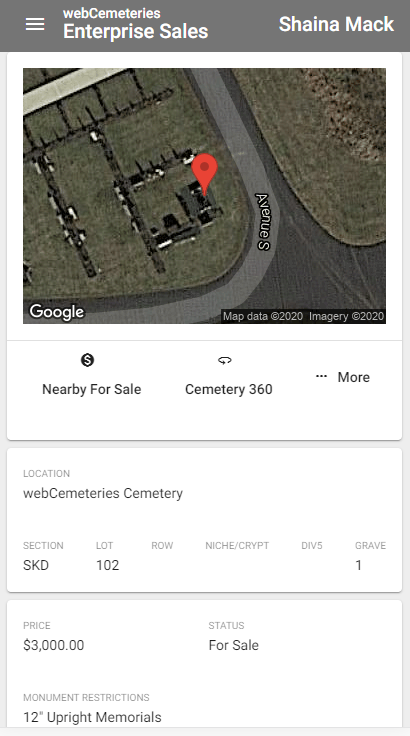
Scroll to view information. The screenshots below depict the data as you scroll down the page in the mobile view.

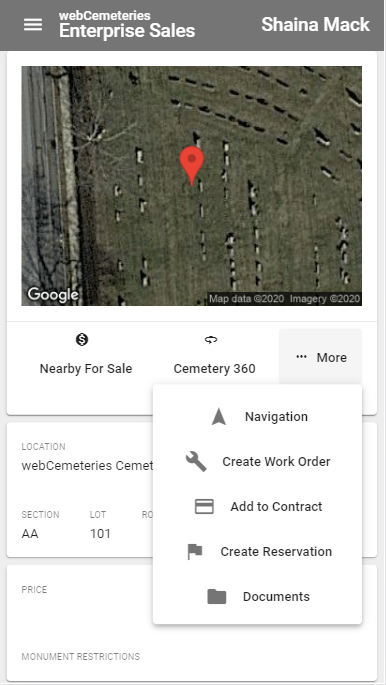
Click "More" at the top of the screen to expand the menu. Click "Create Reservation" to start creating a reservation for this property.
Select the reservation type from the drop down list of types for your cemetery. Next, enter a deposit amount if applicable. The expiration date field will be filled in based on the reservation type selected, with the exception of reservation types that allow for a custom expiration date to be set.
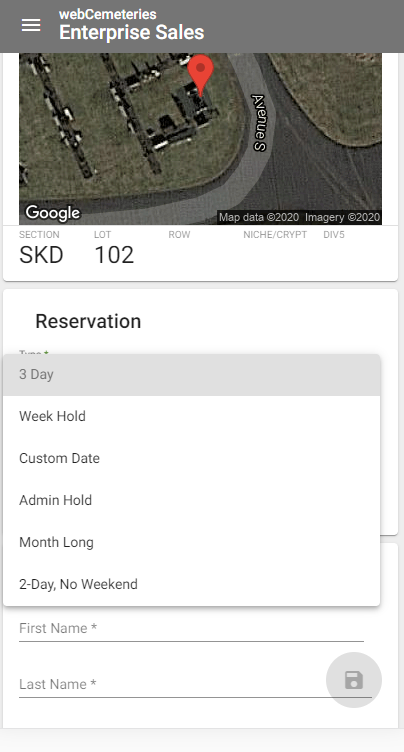
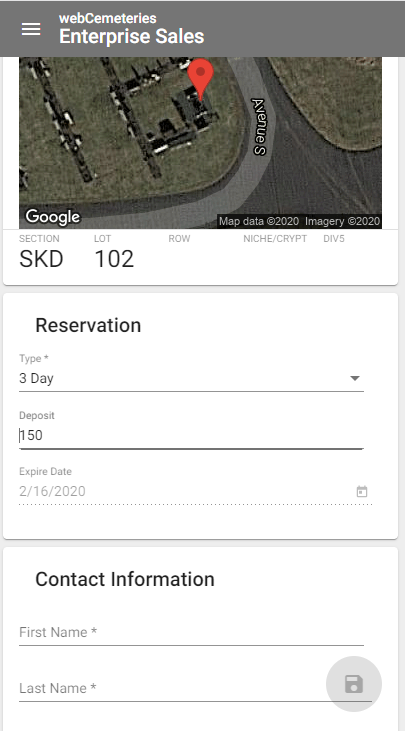
Next, enter the contact information for the person who is reserving the property. You are required to enter First and Last Name. You can always edit this information or add more information later on.

Enter any notes and then click the green save button in the bottom right corner of the page. Congratulations you just reserved your first property!
Step 6Search and Manage Existing Reservations.
Depending on the user roles that were created, particular users will be able to access the Reservation Search to manage and view existing reservations. To access this tool, click on the three bar menu in the top left corner of the page and then select "Home." From there, click the "Reservations" icon to access the search tool. This tool was designed to function outside of the Sales App and inside of the management system because it is a reservation management tool.
See this How to Guide which will walk you through the features and functions of the Reservation Search in Management.
Learn more about viewing your reserved properties in the Enterprise Sales App through this article.
You will also receive an email when your reservations are about to expire. Emails are sent to the counselor who created the reservation and look like this:

