Understanding and Managing User Roles
Learn how to Manage a User's Permissions.
Understanding User Roles
User Roles were created to allow cemetery administrators to easily assign specific users to a predetermined set of user permissions based on the user's role in the cemetery. User roles allow access to specific areas of applications, while restricting access to other areas or applications based on the role. Under the User Roles page, cemetery administrators will notice three default user roles along with the ability to create unique user roles.
The three default user roles are defined as this:
-
Full Access- This role provides the user with full access to manage the cemetery including: users, cemetery settings, contracts and category settings (e.g. Military Ranks).
-
Cemetery Read/Write- This role provides the user with read/write access to most records. This level cannot change information about the cemetery, the users and the category settings.
-
Cemetery Read- This role provides the user with the ability to view the data but not modify it.
As a cemetery administrator, you have the ability to create unique user roles that provide more limited permissions. For example, you could create a "Family Counselor" role that gives full access to view and create reservations and contracts in Enterprise Sales but limits the user's permission elsewhere in the Management System to Read only. Please check out Best Practices for Specific Limited Access User Roles for some other specific use cases with limited access.
Managing User Roles
If you are a cemetery administrator, you will be able to access these settings. If you are not a cemetery administrator, reach out to your cemetery administrator or contact support@webcemeteries.com.
Step 1
Log in to webCemeteries Management.
Step 2
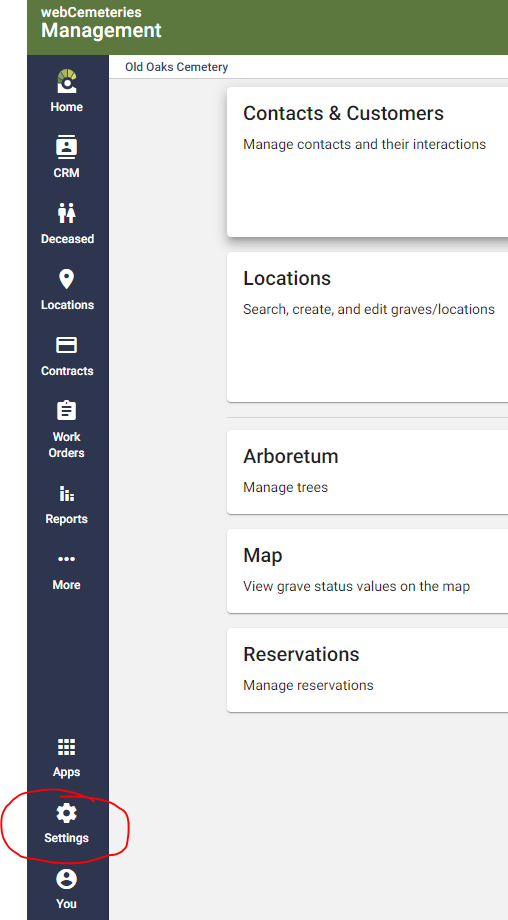
Select "Settings" from the left side Menu.

Step 3
Select "User Management”

Step 4
You will now see the list of User Roles for your organization.

Step 5
Click on a role to view or edit the default settings for that role. Orange toggles mean that the setting is enabled. If you make changes to a role, remember to save your changes by clicking the orange save button in the bottom right corner of the page.

Create a New User Role
Step 1
Follow steps 1-5 above. To create a new user role, click the orange "+" button.

Step 2
You'll be required to enter a role name. From there, you can start with a permission template, which will save you time while creating user roles that are mostly read/write or read only. You are not required to use one of the permission templates.

Step 3
Permissions are granted by application. Once you've created the new role, be sure to click the save button in the bottom right corner of the page.

Step 4
Now that your new role has been created, you can start assigning users or updating existing users to have that new role. For information on how to Add a New User, please see this guide.
