Building Contracts in Enterprise Sales
Step 1
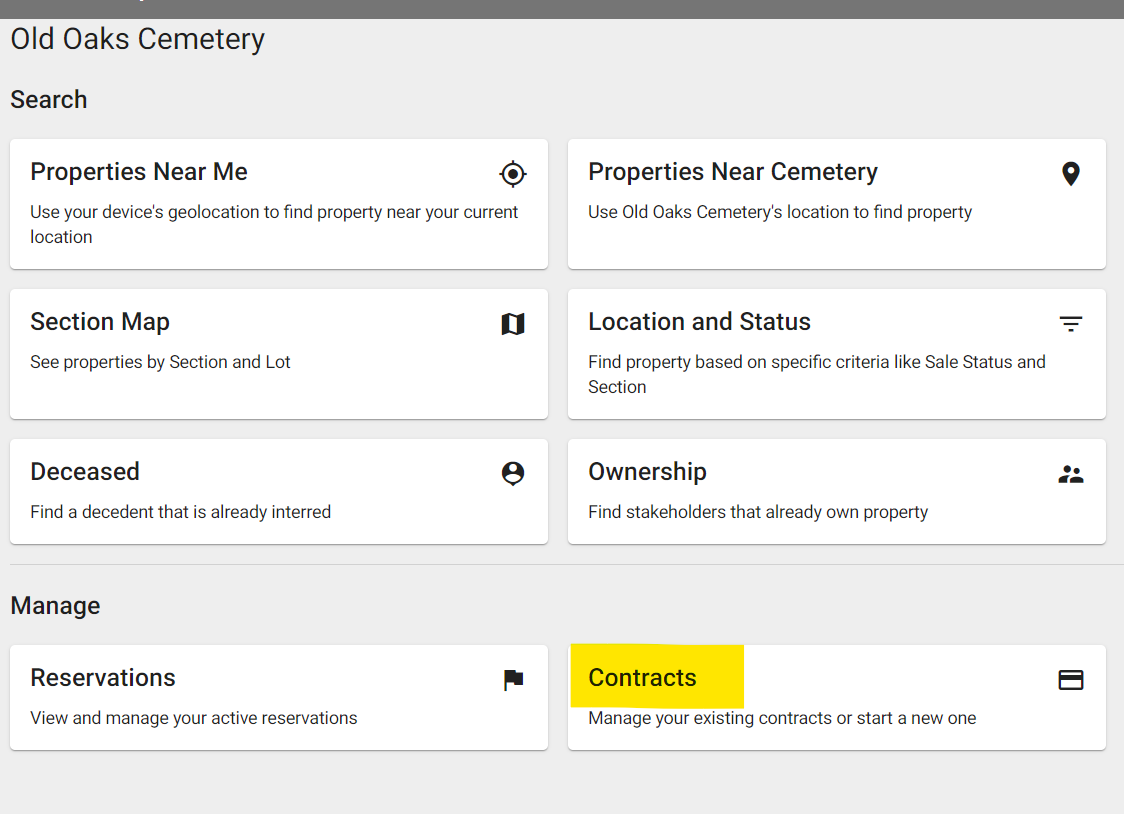
Open Enterprise Sales.
Step 2
Click "Contracts"

Step 3
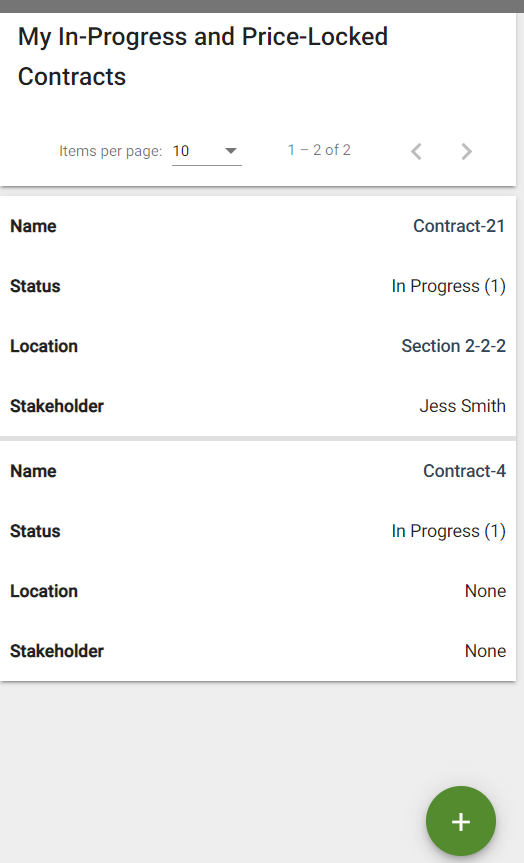
Click the bright green circle with the plus sign to start building a contract.

Step 4
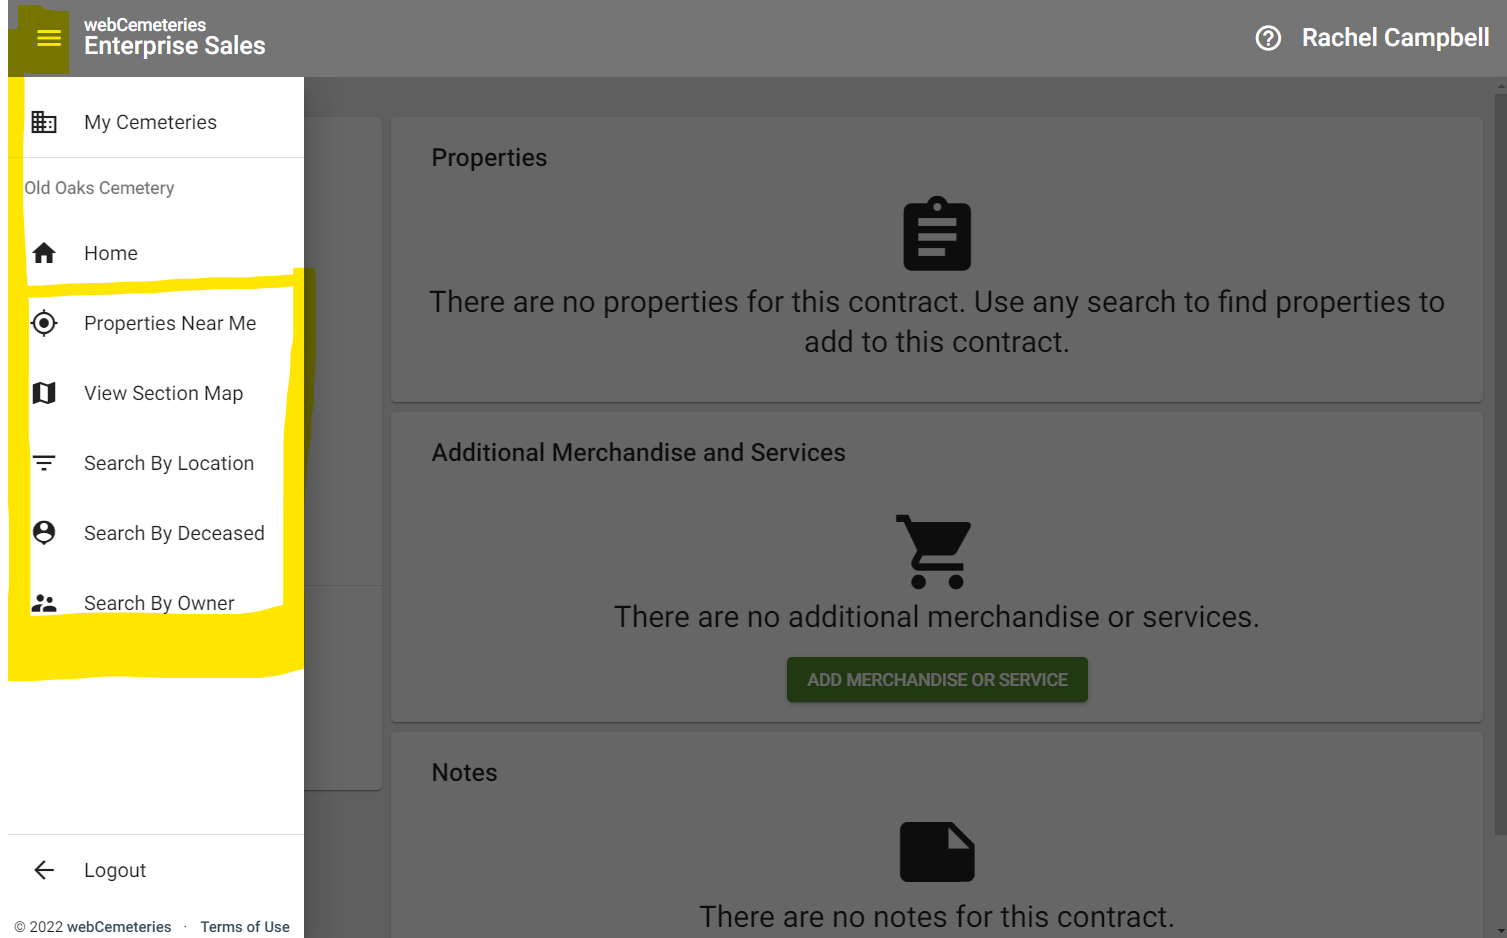
Add Properties to a contract by clicking the three bar menu in the upper left corner of the screen and searching by location.

Step 5
From the search results, select the property you’d like to add to the contract.
Step 6
On the property page, click the “…More” button. Then click “Add to Contract.”

Step 7
Select the contract number that you’d like to add this property to from the drop down menu. If a price was entered for this property, you’ll see it in the “Current Price” field. If you need to enter a custom price, enter it now and enter a reason for that custom price.

Step 8
Click “Add” once you are ready to add this property to the contract.
Step 9
You can now continue to add properties to the contract by following steps 4-7 above. Or return to the main menu and click “Contracts” to continue adding merchandise, services, deceased records and more.
Step 10
From the contracts screen in Enterprise Sales, you can Lock a contract, Cancel a Contract and view legal terms.
Step 11
For a more detailed view of contracts, open up webCemeteries Management, locate your contract and finish building your contract.
