How to Create a Work Order
Log into webCemeteries Management.
Step 2
Hover over "Work Orders" on the left side menu and click "Create New Work Order".

Step 3
Work orders will always open to a default status search of open and in progress orders. Before adding a new work order, you may want to verify that the work order has not yet been entered. You can do so by searching work orders.
Step 4
Alternatively, if you're in the Work Order's Search, to create a new work order, click the yellow circle with the plus sign at the bottom right corner before the search results list.

Step 5
You can then enter the information for your new work order. Start by entering the Title (keep it simple) and the Job Type. You can edit job types if you don't have the right Job Category in your drop-down list.
Step 6
From there, fill in additional details for your work order. If you don't see the user you need in the assigned user drop-down list (such as a new maintenance worker), you can add a new user. The Requested By field will pull from your CRM, so you can search by last name.

Step 7
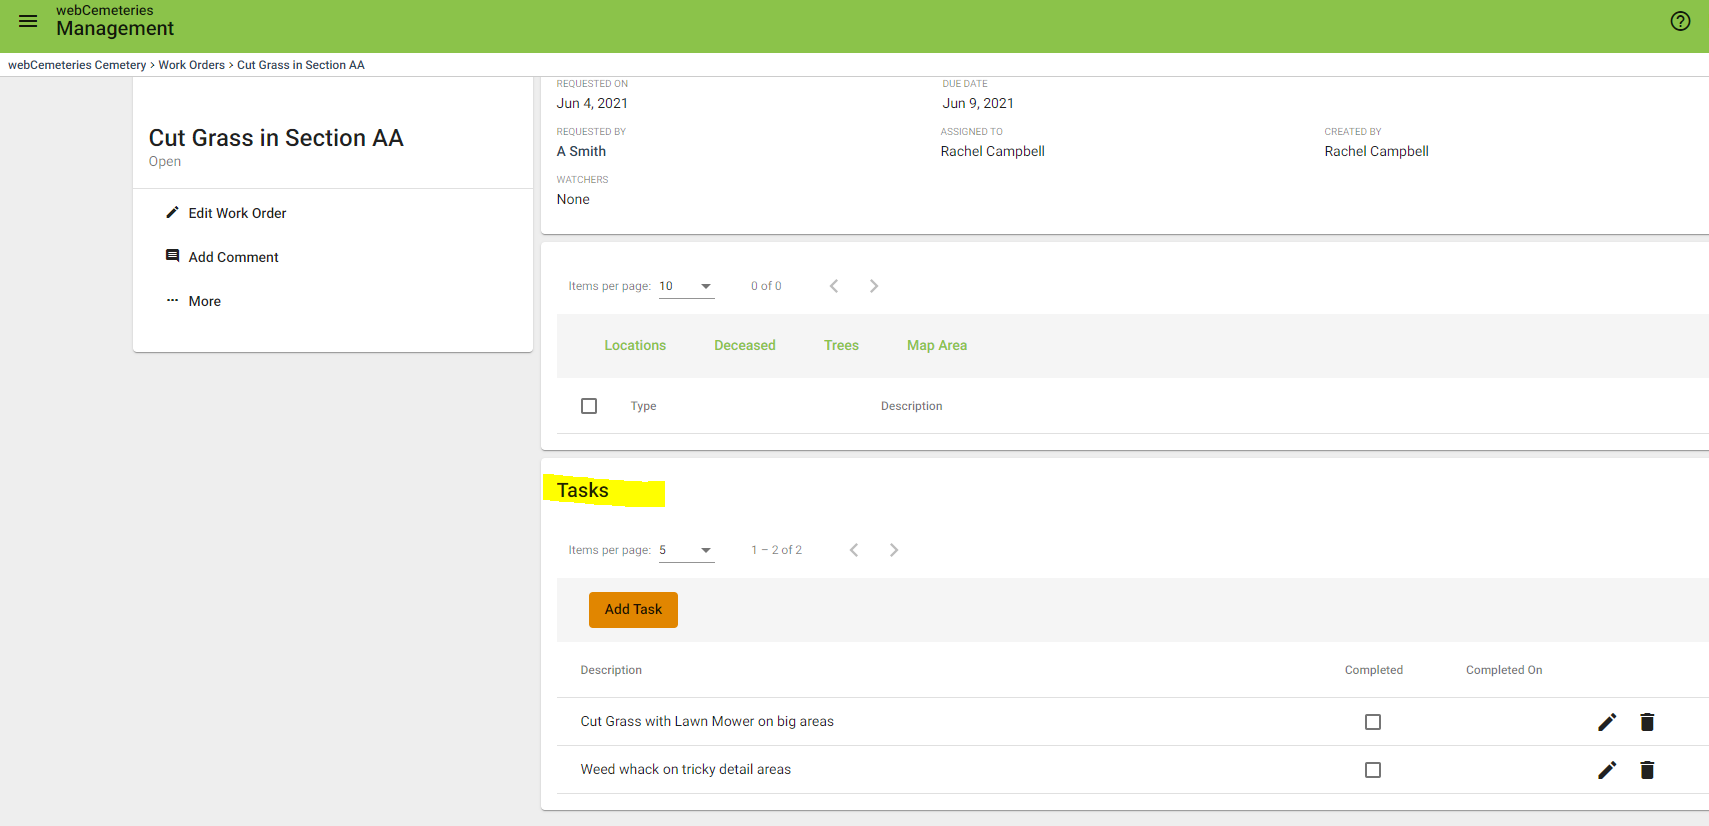
Once you have added the title, job type, priority, due date, assigned user, requested by, and description, you can click "Create Work Order" at the bottom middle of the screen. Once the work order has been created, you will be able to go into the new work order to add more details such as the location, comments, photos, and more.

Step 8
You can add sub-tasks or child steps, allowing you to create more complicated scenarios and multi-step processes. This will allow you to document and ensure each step of the process is being completed. You can also create Work Order Templates for jobs with sub-tasks that your cemetery regularly needs (making it easier to select instead of type out the sub-tasks every time).

Video Demonstration
