Editing the Layout of a Location
Step 1
Log into webCemeteries Management.
Step 2
Hover over "Locations" on the left side menu and click "Search Locations".

Step 3
Search by Location and open the Location you wish to view.
Step 4
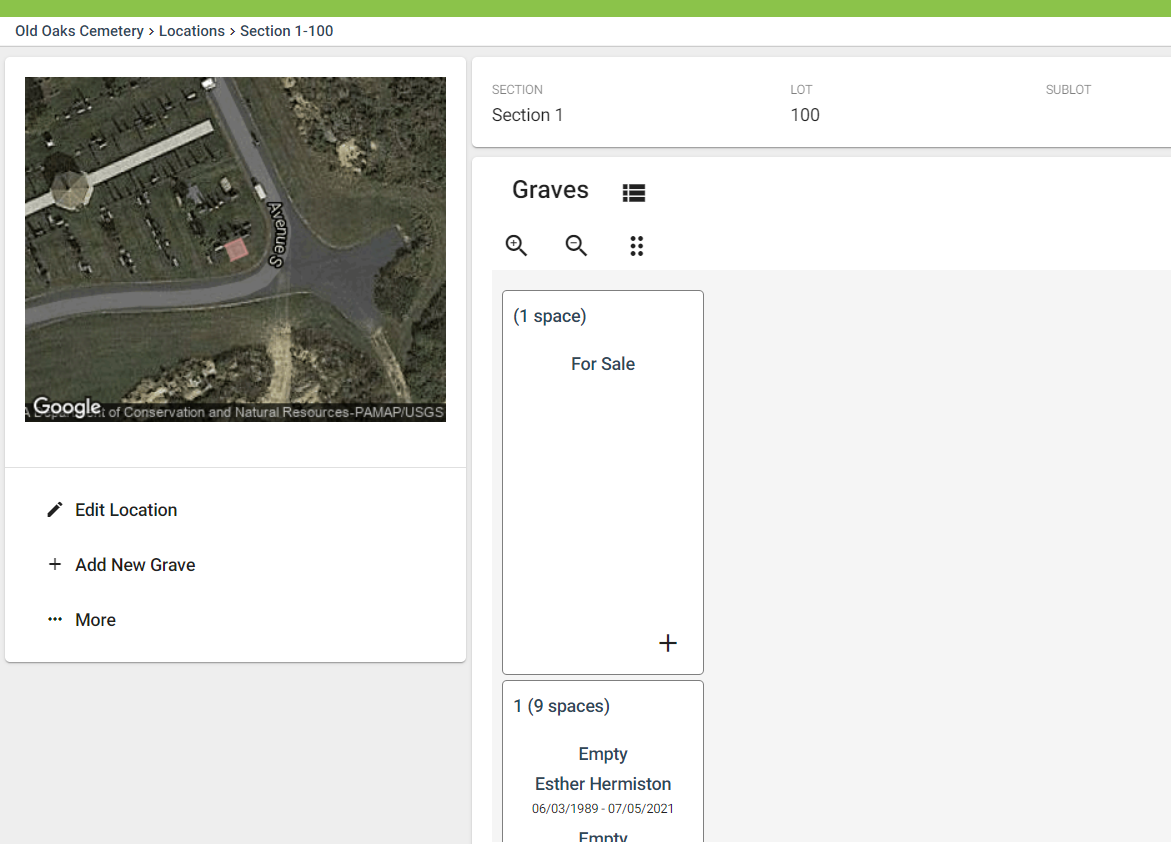
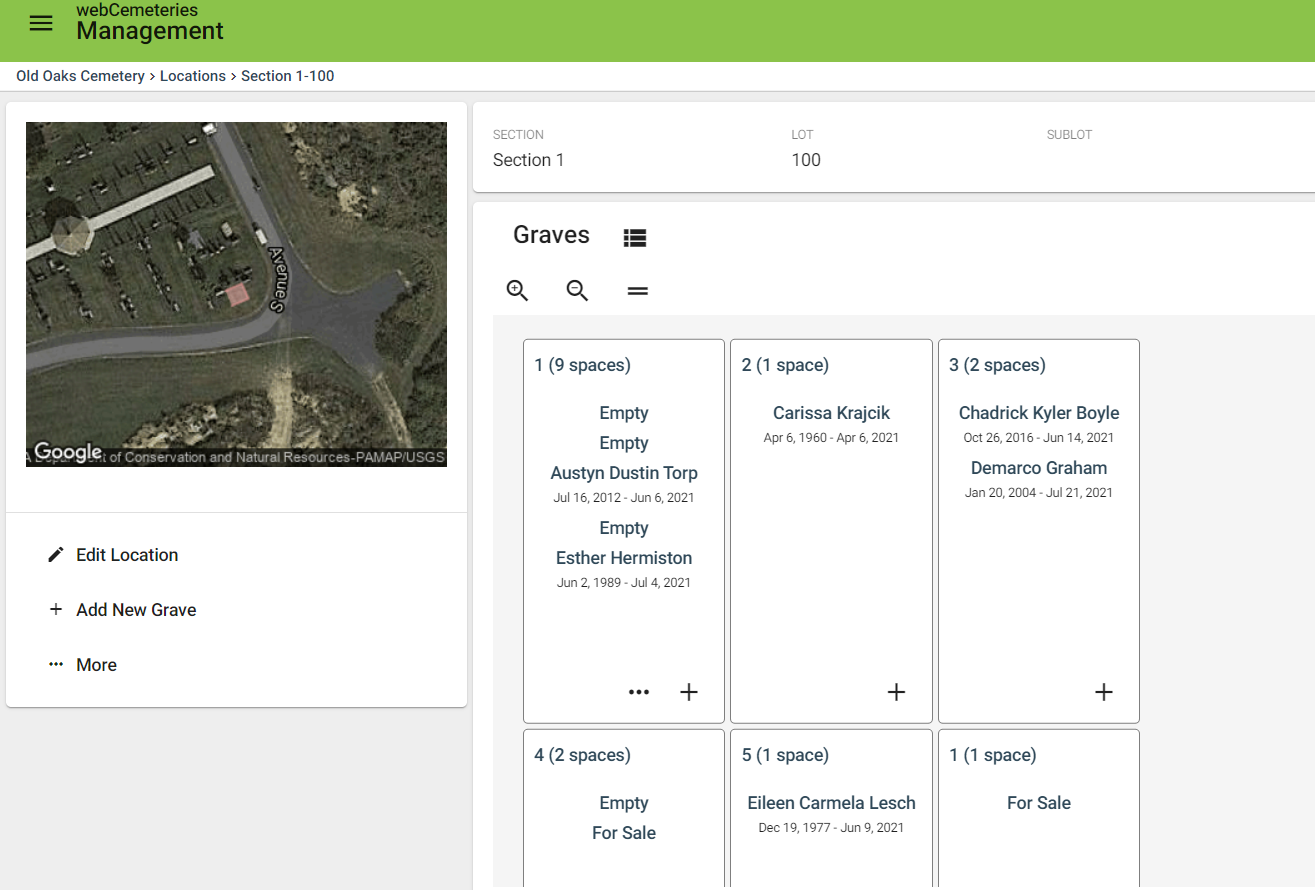
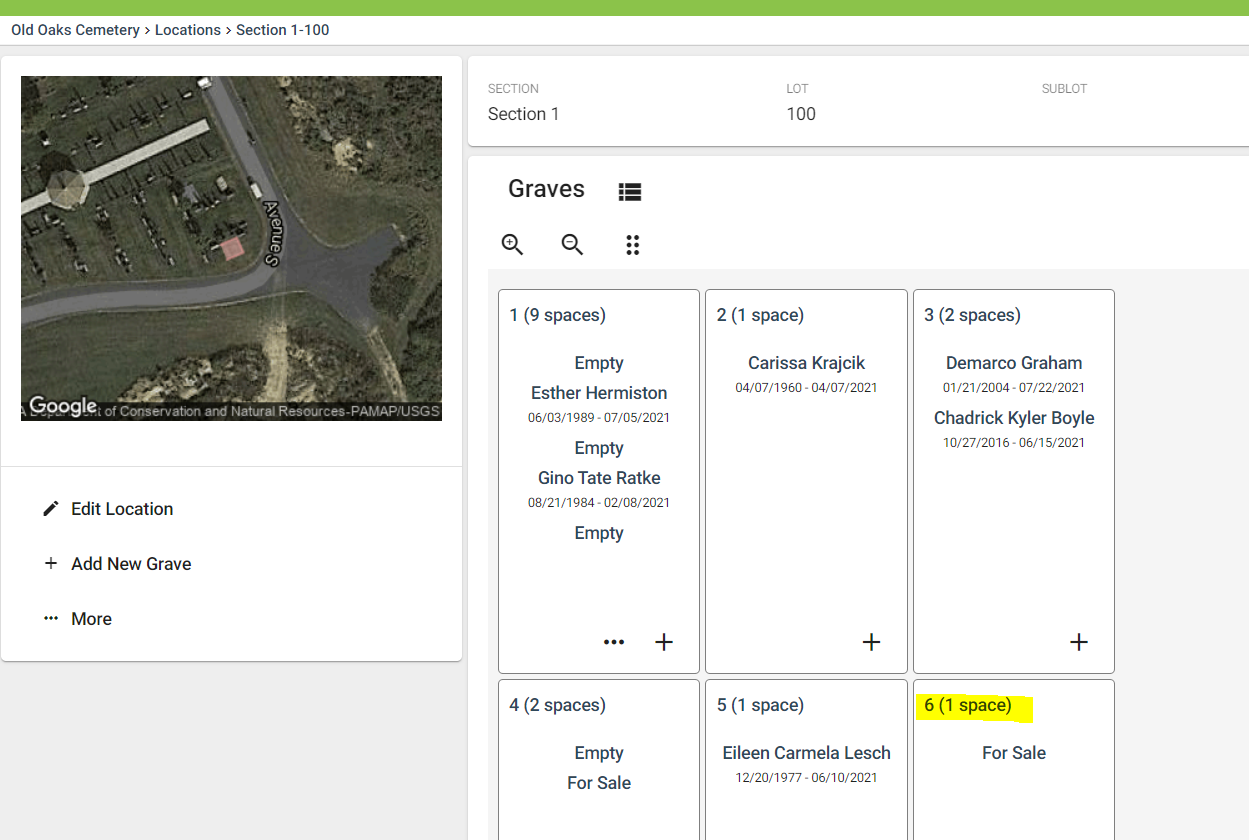
Make sure you’re on the Layout View of your location. When you’re on the layout view, you will see white boxes around the graves/spaces, such as below. To navigate between the List view and the Layout view, see this article: Exploring the Location Page
Step 5
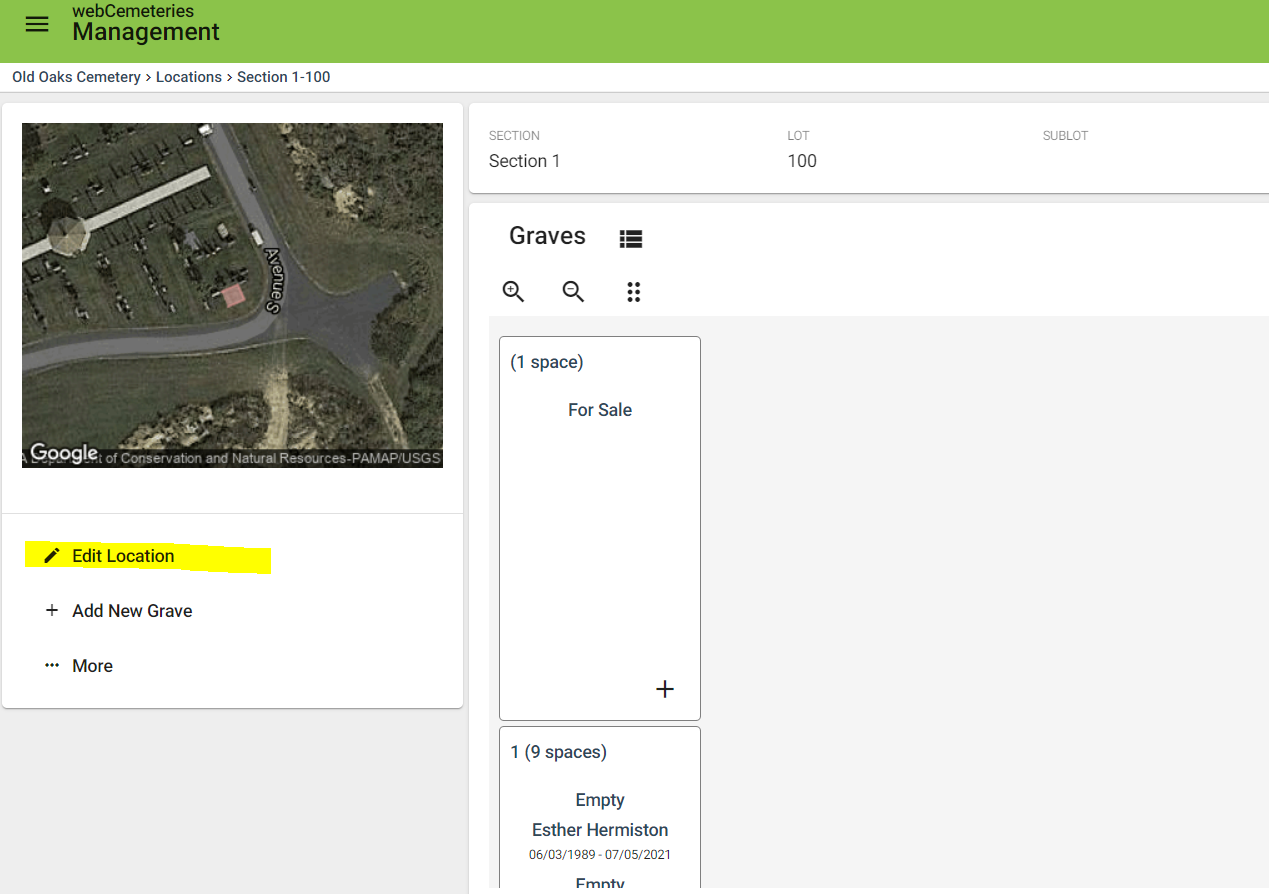
To edit the Graves Per Row or Grave Orientation, click Edit Location.
-
Graves Per Row: (or Graves Per Column) = this is the count of graves in a row (if you have horizontal orientation) or in a column (if you have vertical orientation).
-
Grave Orientation: The first grave in the Lot could start at any corner of the lot, and you could count up horizontally or vertically from that starting point.
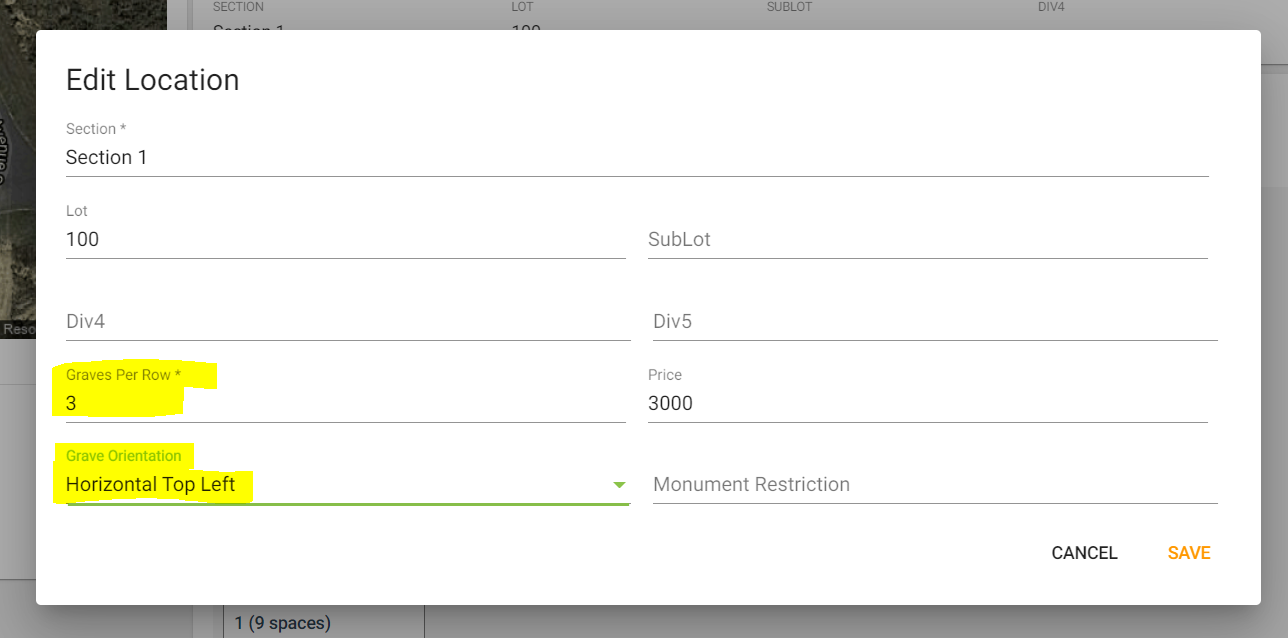
After making any changes, make sure to click SAVE.
Step 6
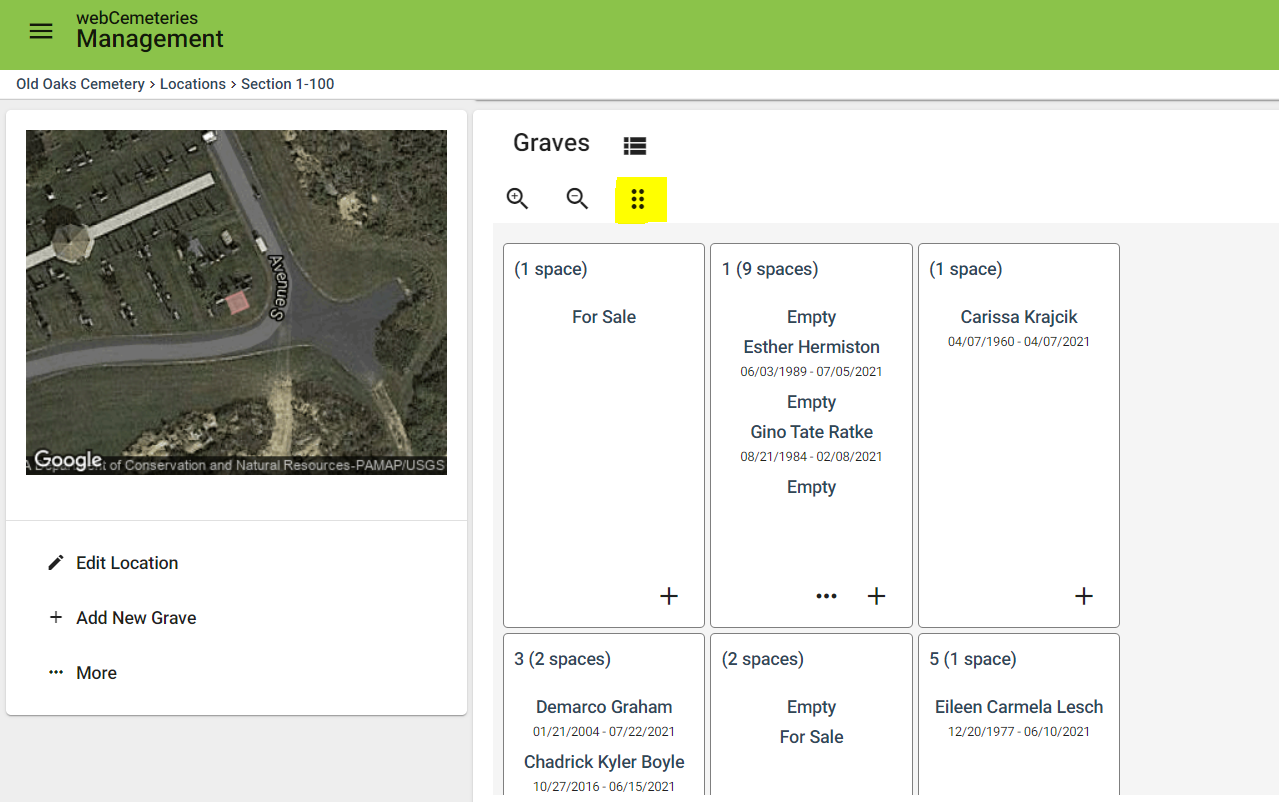
Once you have the Grave Orientation and Graves Per Row (or Column) that you want, you can also edit the Grave Placement via our click/drag tool. Click the six dot icon to the right of the magnifying zoom in/out icons.
Step 7
You can now use the click, drag & drop tool. This may take a little playing around to get the hang of it.
-
Once you’ve clicked the six dot icon, you can click and drag graves to move them around. Click and hold down on the grave you wish to move, and then move it to where you want it to be.


-
Once you have the grave where you want it to be, you can let go of clicking on your mouse. It will take a moment for the graves to re-align to catch up to this new placement.
Step 8
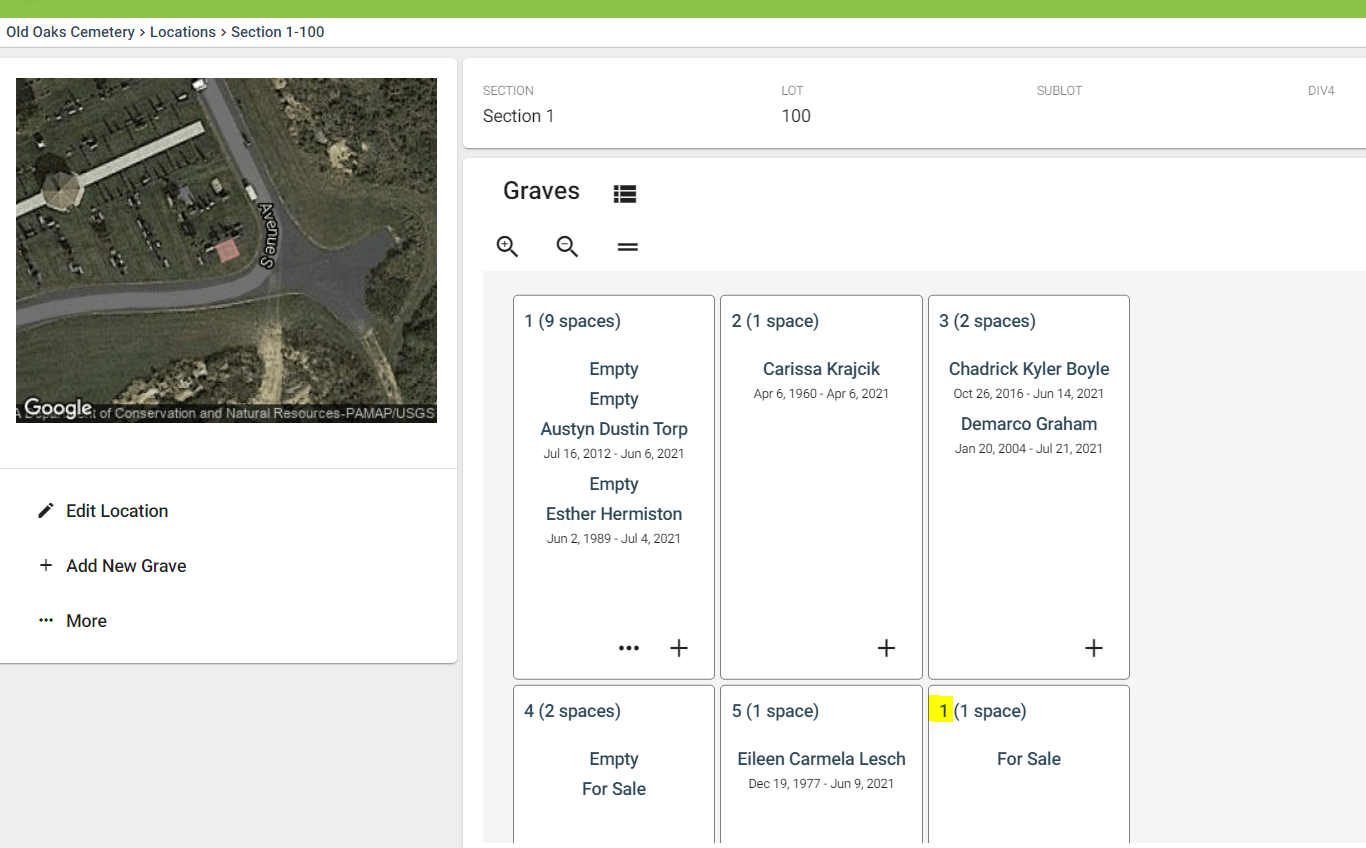
After you’ve changed the placement of the grave(s), you may wish to re-number (or letter) one or more of the graves. Click on the number of the grave you wish to edit.
Step 9
Click Edit Details.

Step 10
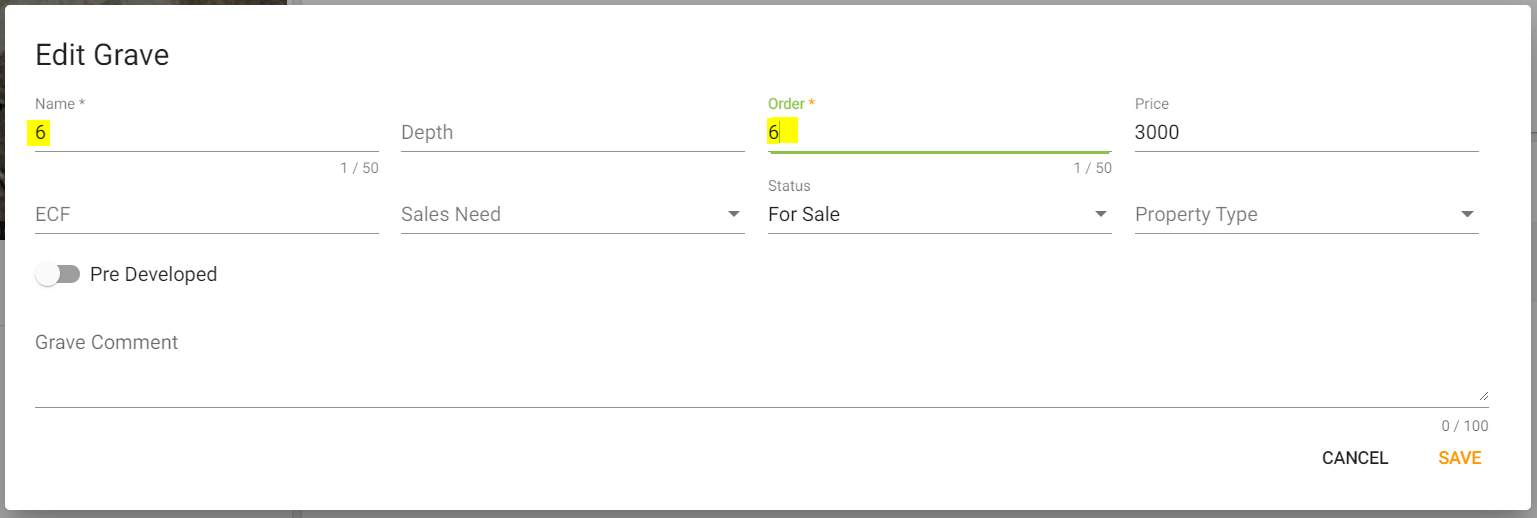
Adjust the Grave Name and Grave Order fields.
-
Name - this is where you can use letters or numbers, such as Grave 1, Grave A, Grave 21B, etc. If your Grave Title/Identifier is Alpha Numeric, include both the number(s) and letter(s).
-
Order - this relates to the Sort Order or Placement of the graves. If you are using Grave Orientation of Horizontal Top Left, then first grave (it could be titled 1, A, 22N, etc) would start at the Top Left, the second grave would be the following grave to the right, the third grave would be the following grave to the right. Then the fourth grave would be the left-most grave below the first grave. The order would look like:
1 2 3
4 5 6
However, even with the order of the graves being sequential numbers, the Names could make the lot look like:
A B C
D E F
This Grave had a Name of 1 (which is the Grave Title), and an Order of 5 (this relates to placement). I want this Grave to be named 6, and in the placement of 6, so I am changing both Name and Order to be 6. Make sure to click SAVE.

Step 11
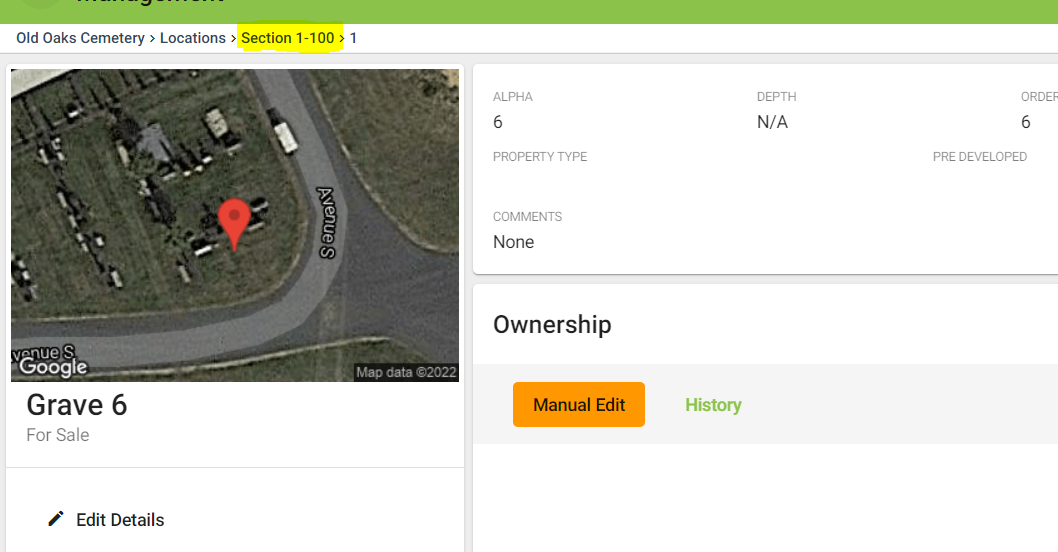
You can go back to the lot/location by going back a step in your breadcrumb trail.
Step 12
You will now see your completed changes in your lot.
Need Help with Lot Layout?
If you need help with your lot layout and adjusting the orientation, placement, and/or numbering, feel free to reach out to webCemteries at support@webcemeteries.com or call 1-800-653-7049 and a customer service representative can assist you.
