webCemeteries Dynamic Forms works with PDF forms. A product like Adobe Acrobat will be needed to create these fillable-field forms. webCemeteries can also support the creation of the Dynamic Forms. Please contact support@webcemeteries.com for further details.
Step 1
Log in to webCemeteries Management.
Step 2
Click your profile button on the top right corner of the screen, and select your cemetery name:

Step 3
Select "Dynamic Forms" from the left Side Bar.

Step 4
Click the orange "+" button to add a new form or if you are adding an updated version of a form already in your dynamic forms list.

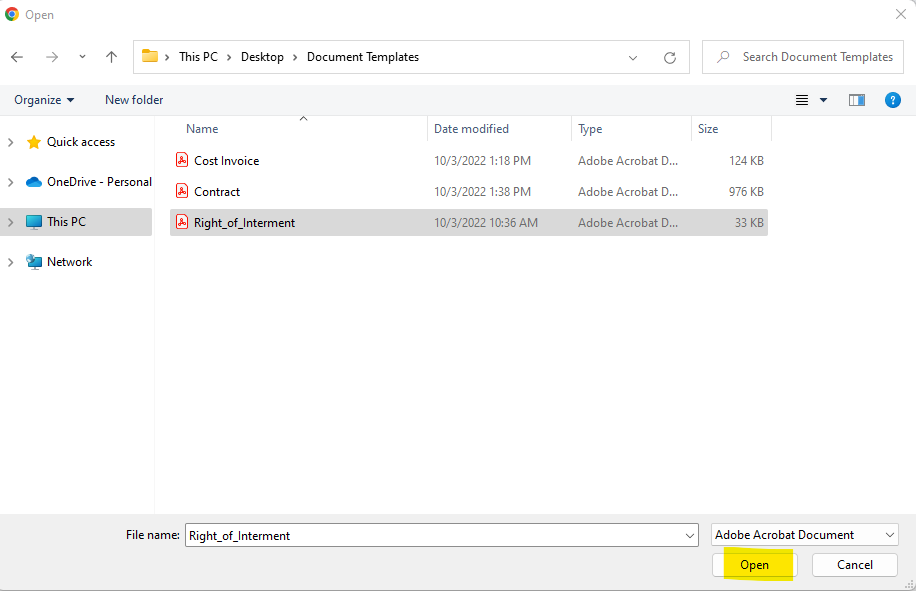
Step 5
Select the file you wish to upload from your device.
Step 6
An upload pop-up window will appear. You will see your file name. Click SAVE.
If this is a new dynamic form
You will see the an orange circle spiraling while the form uploads.
If this is an updated version of a dynamic form already in your settings
You will see this Upload Options window pop up. You can choose to replace existing forms or create new forms.

Step 7
Click on the file name you just uploaded.

Step 8
You will see the fields from your fillable field PDF show up on the left hand side.
New Form
Each field will have a blue square with a white question mark.

Updated Version of a Form
The system will remember the fields you've already mapped, and there will still be green checks from when you originally matched fields. If you have any adjustments to make, you can re-map, or if you have any new fields to map, you can map them now.
Step 9
One by one, go through each field and match your fillable field title to a webCemeteries field title. For instance, CemeteryName is the PDF's field title and Cemetery.Name is the title in webCemeteries Management.

Step 10
You will know you are done when all of the question marks have changed to checkmarks (there is no separate SAVE button). You can click the < BACK button to see your document in your Dynamic Forms area.

Step 11
You can now go to a different module and generate documents from your new dynamic form(s).