How to Add/Update a New User for Enterprise Sales
Adding a New User
Step 1
Log into webCemeteries Management.
Step 2
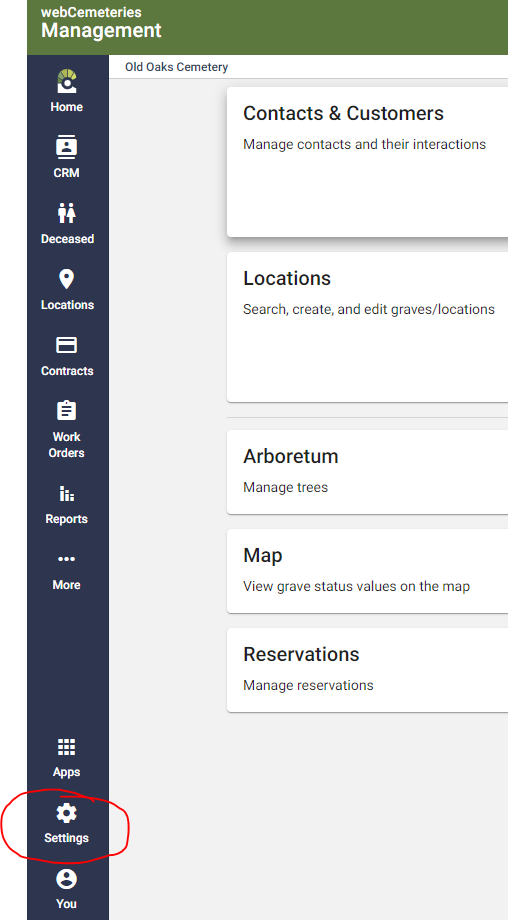
Select "Settings" from the left side Menu.

Step 3
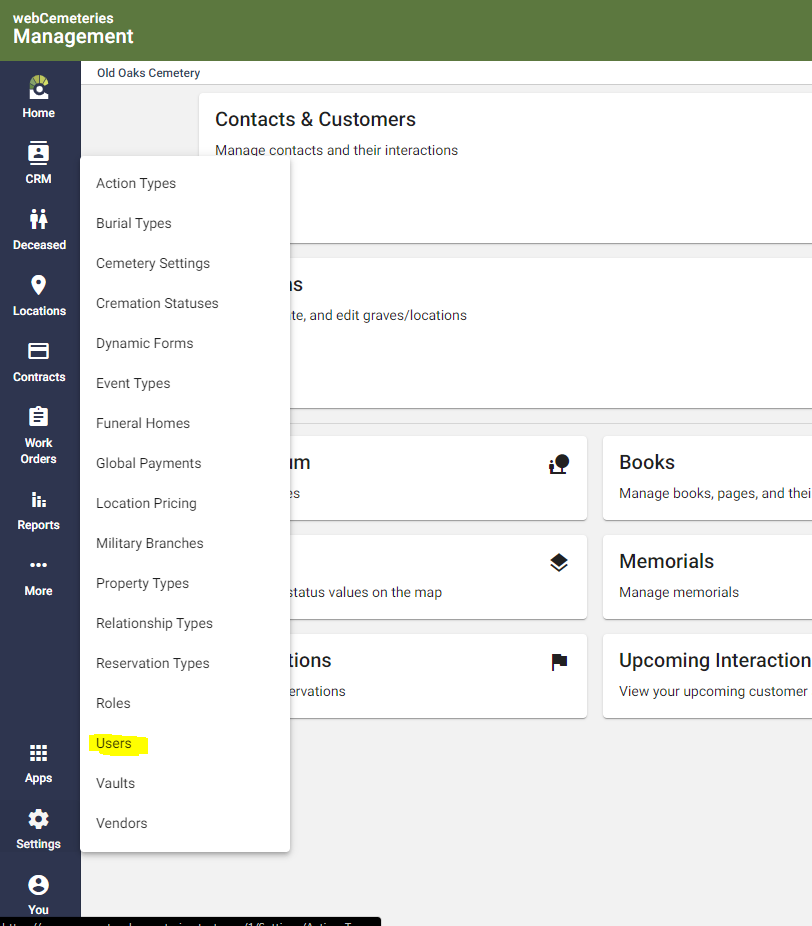
Click “Users" from the left side menu.

Step 4
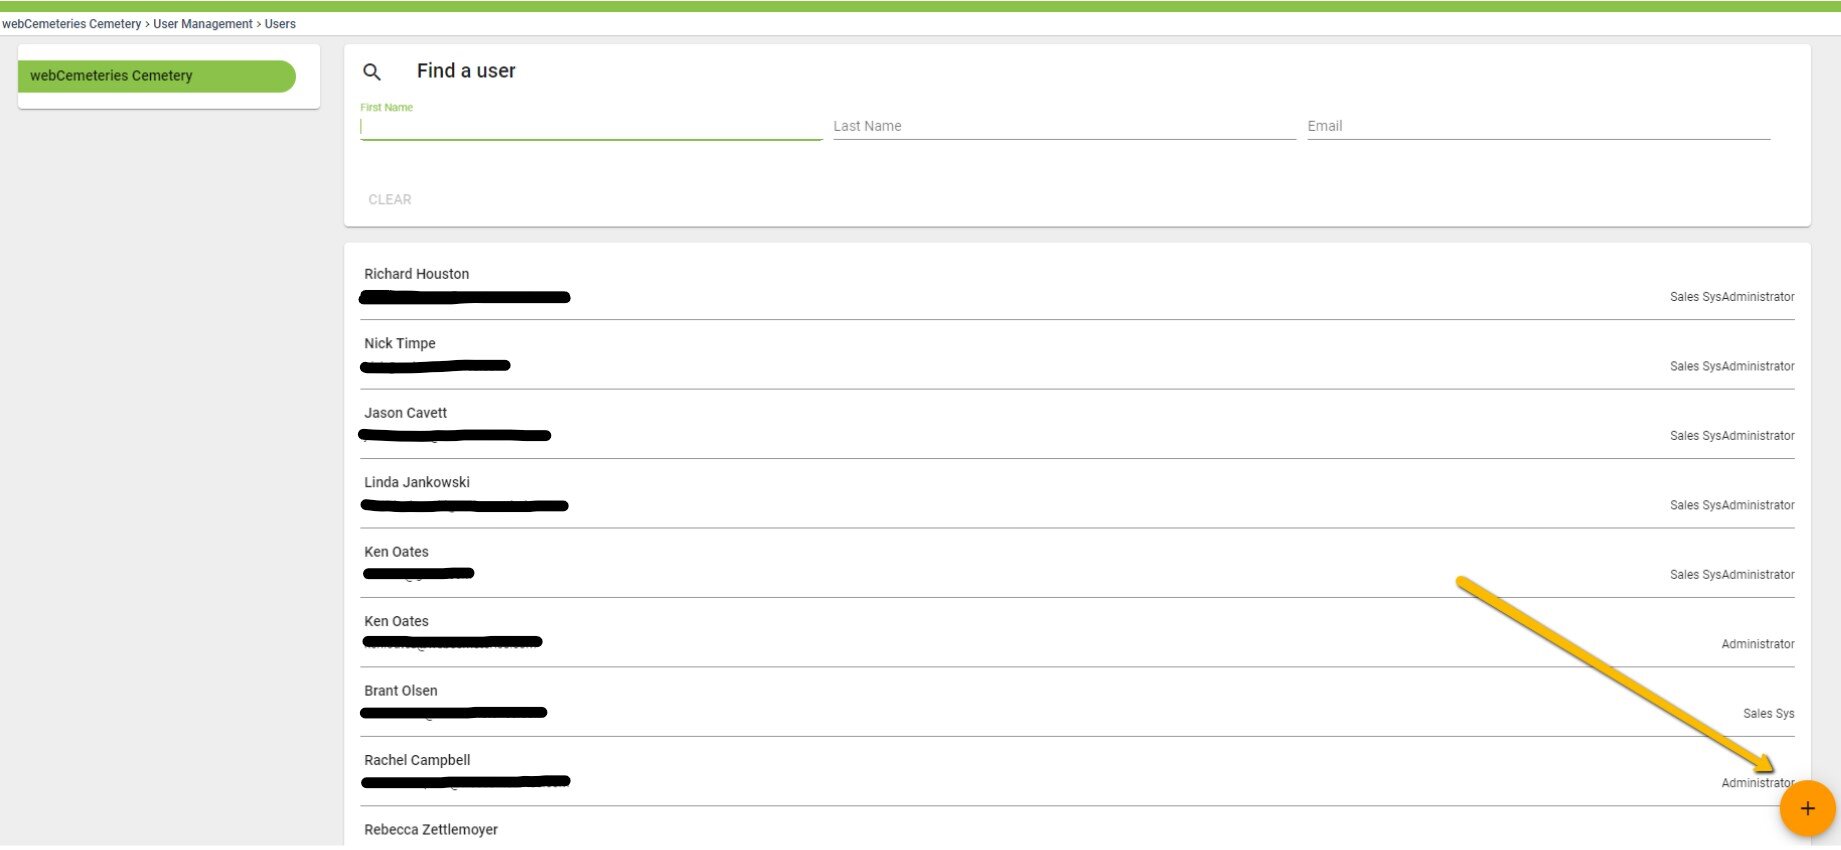
You will see a list of users in your cemetery. To add a new user, click on the plus sign in the bottom right corner of the page.

Step 5
You will be prompted to enter the email address for the account you are creating.

Once the email address has been entered, an email will get sent to that person's email account with a password reset link which allow them to set a password for their webCemeteries account.

Step 6
Next you will see the user's permission page. Toggle on the "Sales (System Generated)" toggle and click the save button in the bottom right corner of the page to add the user to the new Enterprise Sales App.

Updating a User's Permissions
Step 1
Log into webCemeteries Management
Step 2
Follow steps 1-4 above.
Step 3
You will see a list of users in your cemetery. Click on an existing user to view their current permissions. If your users list includes users who have access to the legacy Lot Inquiry Sales App they will automatically be granted access to the new Enterprise Sales App. You will notice this extra "Sales (System Generated)" Role at the top of their user permissions page.

Step 4
To revoke access to the Enterprise Sales app, simply toggle off the "Sales (System Generated)" role at the top of the page then click the Save icon in the bottom right corner of the page. You can also revoke access to the legacy Lot Inquiry Sales App, but if access is revoked for this app it can not be adding back since this app will be retired.
Giving a User Admin Access to Add and Edit Enterprise Sales App Users
Step 1
Log into webCemeteries Management
Step 2
Select "Settings" from the left side Menu.

Step 3
Click “Users" from the left side menu.

Step 4
This will take you to the User Roles page. Click "Create Role" to add a new role.

Step 5
Give the role a name and then under the management portion of the role details, toggle on the following settings as they appear in the screenshot and then click "Save."
Cemetery: Read
User: Read, Write, Delete

Step 6
Click on Enterprise Sales to edit specific permissions for the role you have created.

Step 7
Navigate back to the users page to start updating user permissions. Simply toggle on this new role in the user's profile and click the save button to activate it.
