How to Set Custom Color Codes for Reservation System
This article will walk you through accessing the Cemetery Settings page in order to set custom color codes for the Reservation System in the Enterprise Sales Application. If you are interested in licensing this application, please reach out to webCemeteries at support@webcemeteries.com or call 1-800-653-7049 for more information.
Step 1
Log into webCemeteries Management.
Step 2
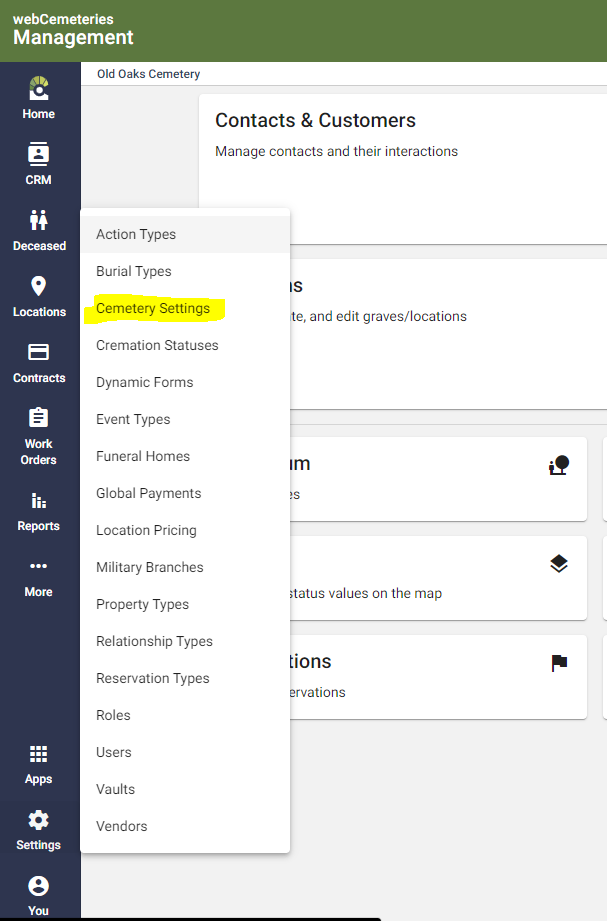
Click on "Settings" and select "Cemetery Settings" from the left side menu.

Step 3
If your cemetery is licensing the Sales App, you will have access to changing the default Grave Status Colors for the Reservation System. Scroll down to the portion of the page that says "Grave Status Colors” (under “Look and Feel”).

Default Grave Status Colors are:

Step 4
To change a default color for your cemetery, click on the field you'd like to change. A box will pop up with a color picker. You can also enter a hex code into the box if you have a specific color you wish to add.

Step 5
Finally, make sure to click the bright orange save button in the bottom right corner of the page before navigating elsewhere.
