Step 1
Log into webCemeteries Management.
Step 2
Hover over "Locations" on the left side menu and click "Search Locations".

Step 3
Select a Section to search from the drop down menu and/or select a property status from the drop down list to search by that status. Click "Search" to begin your search.

Step 4
Your search results will appear below. Click on the name of your property to view to location page which will provide you with location details.

Step 5
On the left side of the page under the map you'll notice "Edit Location," "Add New Grave," and "More." Click "Add New Grave."

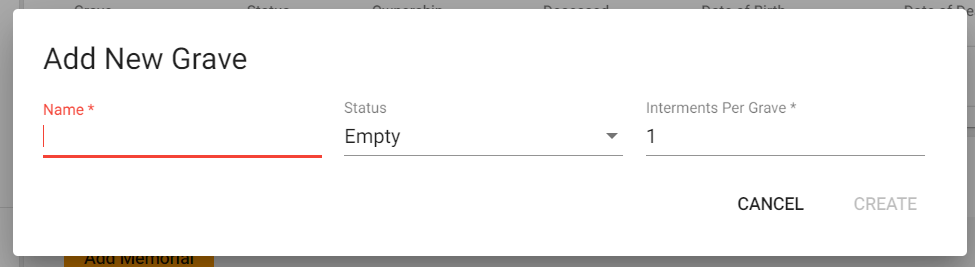
Step 6
Enter the the Name of the grave (it can be any combination of letters and/or numbers) and then select a grave status from the drop down list. The grave status you select will impact your ability to enter new deceased records into that grave. “For Sale” and “Empty” status graves will allow you to add a new deceased record. You can also add the number of interments you are adding to the grave (e.g., if it’s a double grave, add “2”). Click "CREATE" to finalize the grave addition.
Quick View
You can click “View” at the bottom to do a quick jump to the new grave you have added.
