Step 1
Log in to webCemeteries Management.
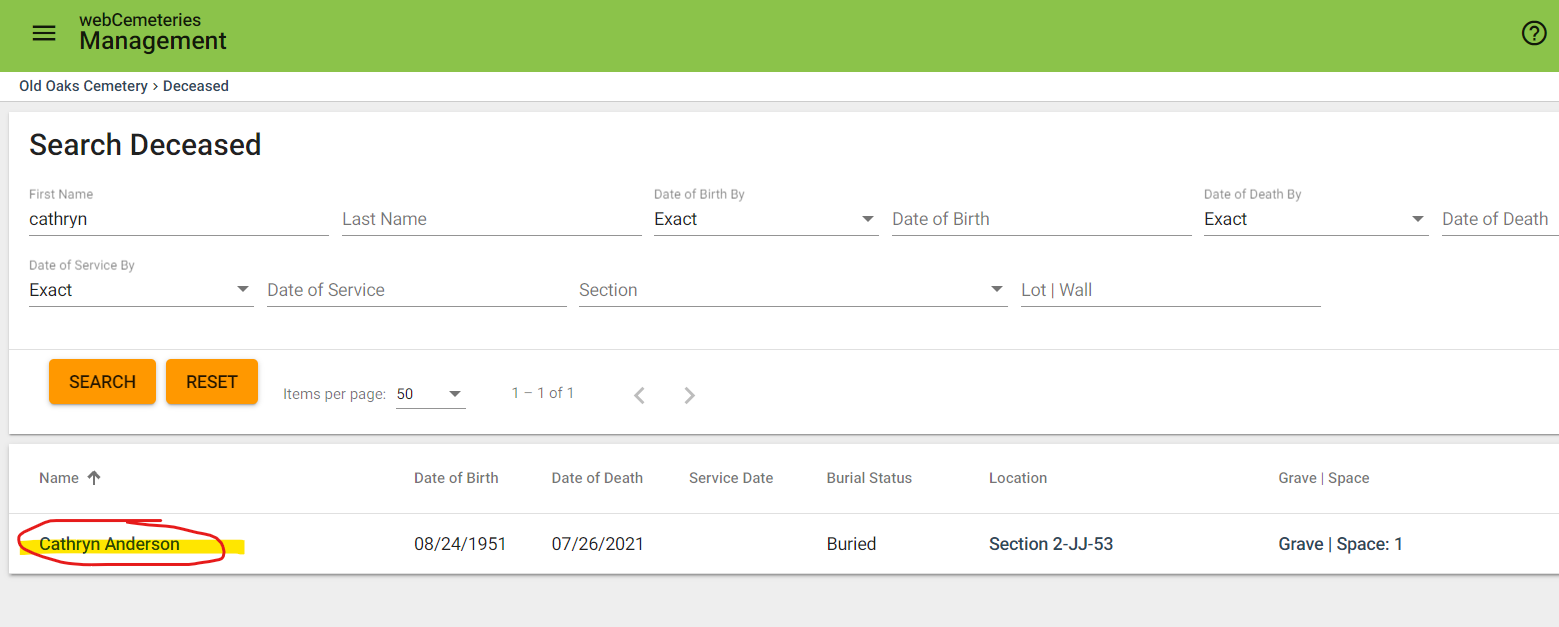
Step 2
Step 3
Click on the deceased name to navigate to the deceased record.
Step 4
Click More>Generate Document.


Step 5
Once you click "Generate Documents", you will be able to select one or more documents from the list of documents you've set up with dynamic forms in your settings by clicking on the check boxes on top of the document.

- You can also see any recently generated documents by clicking on "Recent".

- Clicking on "Reset" will de-select any of your selected documents.

- Click "Next" to continue.

Step 6
Review your form and fill out any of the necessary fields.

- If you selected multiple documents, you can combine them into a single PDF form.

- You can click and drag the name of the documents to change their order.

-
If you wish to download or print, click the three dots in the top right corner.

Once you are satisfied, click "Next" to go to the next step.

Step 7
Rename your document if necessary and click "Finalize"

- If you chose multiple documents, you'll be able to rename each individually.
- If you combined them into one form, you'll only need to add one name.
Click "Finalize" when you're ready.
Step 8
The document will be uploaded to webCemeteries
Navigate to the "Documents" area at the bottom of the deceased record page.

If you downloaded the file
You can upload the document to the appropriate area you wish to add this as a document. You can also of course print, sign, and then upload to wherever you wish in webCemeteries Management.